A projector can make movie night feel special, but the wrong setup can also create daily frustration. Many homeowners start searching for home projector installation ideas after realizing that image size is only part of the experience. Where the projector sits, how the room handles light, and what happens to cables, sound, and control all matter just as much.
The best projector installations do not call attention to themselves. They give you a large, comfortable picture, simple control, and a room that still feels clean and usable when nothing is playing. That is true whether you are finishing a basement, upgrading a media room, or trying to add a big-screen experience to a family room without turning it into a black-box theater.
What good home projector installation ideas have in common
Strong projector design starts with the room, not the projector. Ceiling height, seating distance, ambient light, wall space, and how the room is used every day will shape the right approach. A setup that works beautifully in a dedicated theater may feel awkward in a main living space.
That is why the best home projector installation ideas usually balance three priorities at once: image performance, visual simplicity, and ease of use. You want the projector in the right location for the lens and screen size, but you also want equipment to feel integrated into the room. And if starting a movie takes five remotes and a few lucky guesses, the system will not get used the way it should.
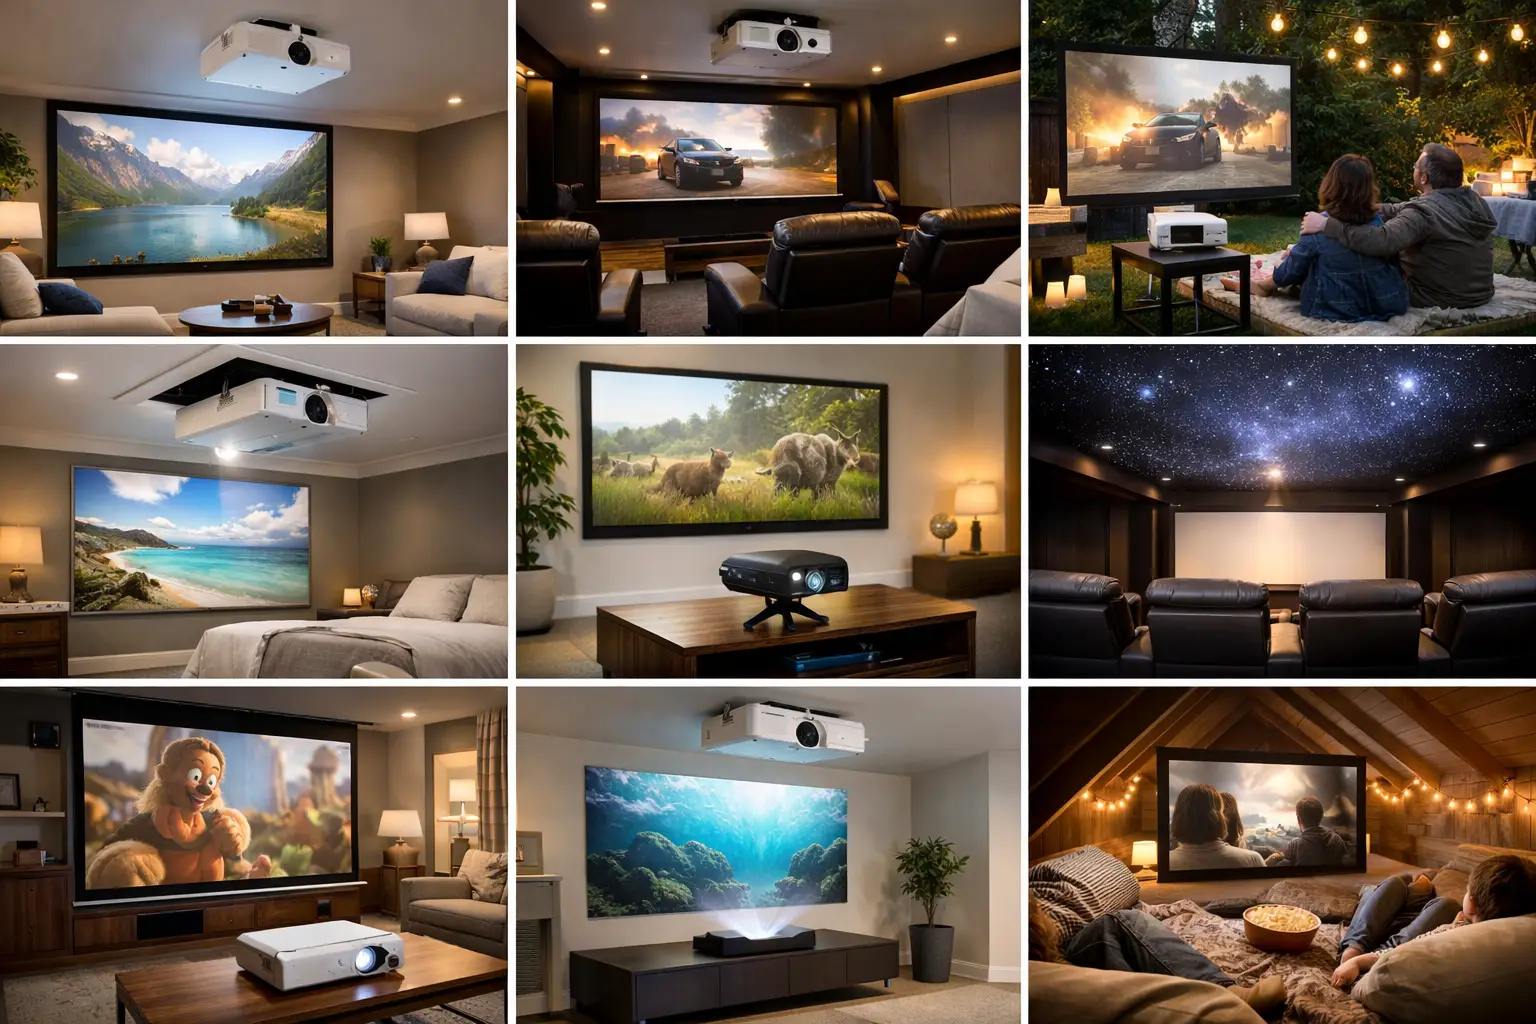
1. A ceiling-mounted projector for a clean, reliable layout
For many homes, a ceiling-mounted projector is still the most practical option. It keeps the unit out of the way, protects sightlines, and helps maintain consistent alignment with the screen. It also avoids the problem of a coffee table or shelf becoming permanent projector real estate.
This approach works especially well in finished basements, bonus rooms, and dedicated media spaces where the ceiling position can be planned around seating and screen placement. The trade-off is that placement has to be precise. Throw distance, lens shift, joist location, power, and signal wiring all need to be coordinated before the mount goes in.
When done well, the projector feels almost invisible. That is usually the goal.
2. A recessed or low-profile mount for rooms that need to stay polished
Some homeowners want projector performance without making the ceiling look crowded. In those cases, a recessed box or very low-profile mount can help the equipment blend in more naturally. This is a strong fit for upscale living rooms, renovated lower levels, or multipurpose spaces where aesthetics matter as much as screen size.
It depends on ceiling structure and available depth, so this is not right for every room. But when the space allows it, reducing the visual footprint of the projector can make the whole room feel more intentional.
The same thinking applies to cabling. If wires are visible, even a great projector can make the room feel unfinished. Hidden infrastructure is often what separates a temporary setup from one that truly feels built in.
3. A drop-down screen in a family room or great room
Not every home has a dedicated theater room, and that is fine. One of the most useful home projector installation ideas is pairing a projector with a motorized drop-down screen in a shared living space. When the screen is up, the room functions normally. When it lowers, the space becomes a much larger entertainment area.
This works well for homeowners who want flexibility without a permanent black screen on the wall. It is also useful in open-concept homes where one room needs to support several activities.
The challenge is making sure the screen location, projector position, and furniture arrangement all work together. A screen that drops in front of windows, built-ins, or a fireplace may look smart on paper but feel inconvenient in daily life. Good planning matters more here than in a dedicated room.
4. An ultra short throw projector for tight spaces
If the room does not allow a traditional ceiling location, an ultra short throw projector can be a smart alternative. These models sit close to the wall or screen, usually on a cabinet, and create a large image without needing a long throw path across the room.
This layout can reduce overhead installation work and may simplify placement in condos, smaller homes, or rooms with ceiling details that make mounting difficult. It can also make maintenance easier because the projector is more accessible.
Still, ultra short throw systems are not automatically easier. They need very stable furniture, careful screen pairing, and thoughtful cable management. Since the projector sits in the room rather than above it, the surrounding cabinetry and equipment layout become more important.
5. Built-in cabinetry that hides equipment and keeps control simple
A projector room usually includes more than a projector. There may be a receiver, streaming box, gaming console, network hardware, or audio components. Without a plan, all of that can collect in plain sight and quickly turn a nice room into a tangle of shelves and blinking lights.
Built-in cabinetry is one of the most practical ways to support a projector installation. It gives equipment a proper home, improves organization, and helps preserve the look of the room. In some projects, it also creates the right place for an ultra short throw projector or a retractable screen housing.
The key is ventilation and serviceability. Equipment should be easy to access, easy to cool, and easy to control. Clean design should not come at the cost of reliability.
6. Surround sound that matches the room instead of overwhelming it
A large projected image deserves better than thin TV speakers or a single soundbar tossed under the screen. Good audio does not need to dominate the room, but it should feel balanced and intentional. In many homes, in-wall or in-ceiling speakers offer the right mix of performance and visual simplicity.
This is where installation ideas should stay grounded in how the room is actually used. A dedicated theater may justify a more immersive speaker layout. A casual basement movie room may be better served by a simpler arrangement that still delivers clear dialogue and strong impact. The best answer is not always the biggest system. It is the one that sounds good, looks clean, and fits the way your family watches content.
7. Light control that protects daytime viewing
Projectors and sunlight are not natural friends. If you want the room to perform well beyond nighttime viewing, think about light control early. Window treatments, screen type, wall color, and projector brightness all affect the final result.
This does not mean every projector room has to be dark and dramatic. Many homeowners want a bright, welcoming space that also handles sports, movies, and streaming during the day. That can absolutely work, but only if the installation accounts for ambient light.
In Northeast Ohio, where basements are common and weather shifts throughout the year, projector rooms often end up in spaces with varying natural light conditions. That makes practical light management even more valuable. A room that looks good at 8 p.m. but washes out every weekend afternoon is not a complete solution.
8. A control setup that feels easy for everyone
One of the biggest differences between a projector system that gets used all the time and one that gets avoided is control. People want to press one button and have the system respond correctly. They do not want to remember input sequences, turn on devices in the right order, or troubleshoot audio every time guests come over.
This is where professional integration adds real value. A projector, screen, audio system, and source devices can be configured to work together in a way that feels straightforward. The room should be easy for everyone in the home to use, not just the most tech-comfortable person.
That simplicity is often what homeowners appreciate most after the install is done. The room feels better, but it also feels easier.
9. Planning for new construction or renovation before drywall closes
If you are building or remodeling, projector planning is much easier before finishes go in. Wiring paths, speaker locations, backing for mounts, power placement, and screen recesses are all simpler and cleaner when addressed early.
Retrofit projects can absolutely produce excellent results, and many do. But prewire creates more options and usually leads to a more polished final appearance. Even if you are not ready to purchase every piece of equipment right away, it often makes sense to prepare the room while walls and ceilings are accessible.
For homeowners working with builders or remodelers, this is where a low-voltage partner can prevent a lot of guesswork. Tri-County Technology often helps clients think through projector placement, screen location, wiring, and control before the room reaches the finish stage, which tends to save both money and compromises later.
Choosing the right idea for your room
The right projector installation is not always the most elaborate one. Sometimes a ceiling mount and a fixed screen are exactly right. In other rooms, a hidden screen and carefully integrated audio will deliver a better everyday experience. It depends on the layout, the lighting, the design goals, and how casually or seriously the space will be used.
That is why it helps to think beyond the projector itself. A room should feel comfortable when the system is on and equally comfortable when it is off. If the technology supports the room instead of taking it over, you are usually on the right track.
A good projector setup should make entertainment feel easy, not technical. The best ideas are the ones that fit your home so naturally that using them becomes second nature.


No responses yet